Amazon Lightsail is one of the best servers to be chosen among users who are willing to start blogging and have a very low investment in the beginning. Amazon Lightsail server comes for one-month free trial and then after the trial period ends the user is charged according to the plans. If you are willing to build a blog and host only one domain then you can choose the WordPress from the instance and it is installed in one click. But if you are willing to host multiple domains and want access to the root of your server then you can configure Amazon Lightsail server with Serverpilot for free of cost.
Serverpilot is user-friendly and has minimum options to access which makes it confusion free for the user, unlike Cpanel which has several options. Configuring Amazon Lightsail with Serverpilot gives you access to database creation and modification, you can also add domains over here and can upload files to the server using any FTP client, we would suggest you to use Filezilla which is a free tool.
To configure Amazon Lightsail with Serverpilot will take some time and patience as it is a little bit lengthy process but it is not a rocket science that you won’t understand. Even if you’re new to servers and configuration then you can watch the video tutorial at the bottom of this article.
How To Configure Amazon Lightsail With Serverpilot
- You must have already signed up for the one-month free trial account or if you have already purchased it then go to the dashboard.
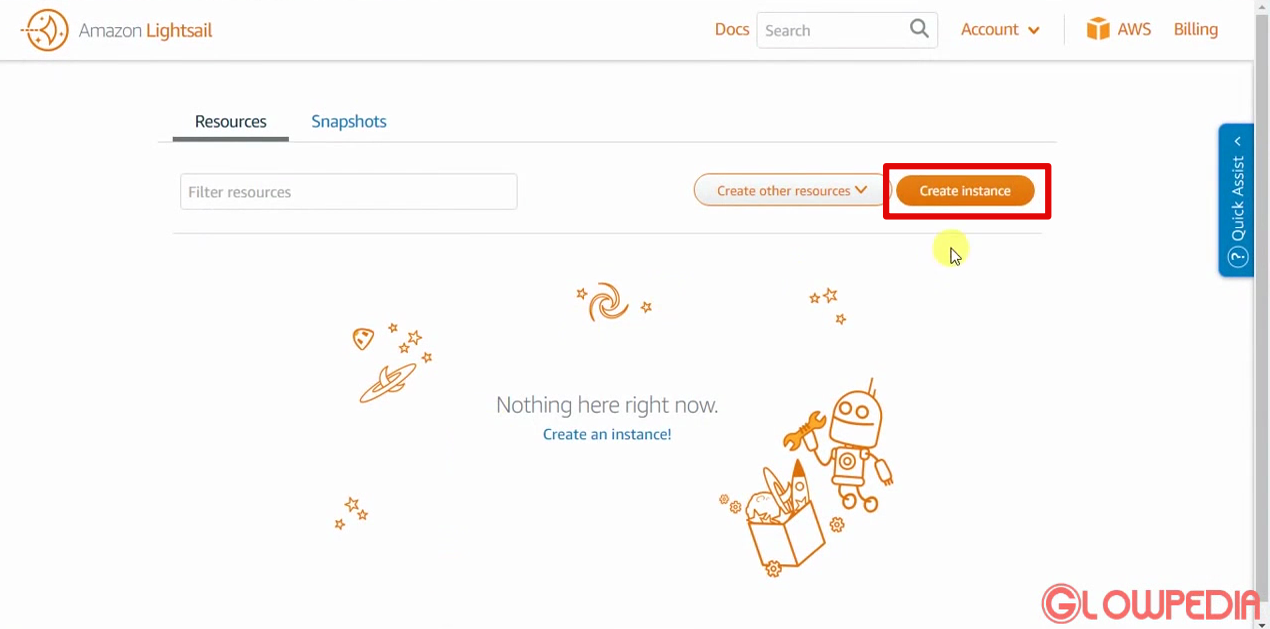
- Now click on create instance

- On the next page, you will see App+OS and Base OS. We need to select Base OS as we will be using an independent server to configure it with Serverpilot.
Again you will see two options Amazon Linux and Ubuntu 16.04 LTS select the second one. - Scroll down and select the first plan that says the first month free or if you want to go with any higher plan according to your requirement then select it.

- Name your instance to whatever you feel like, you can name it as your domain or leave it to the auto-generated name and then click on Create.
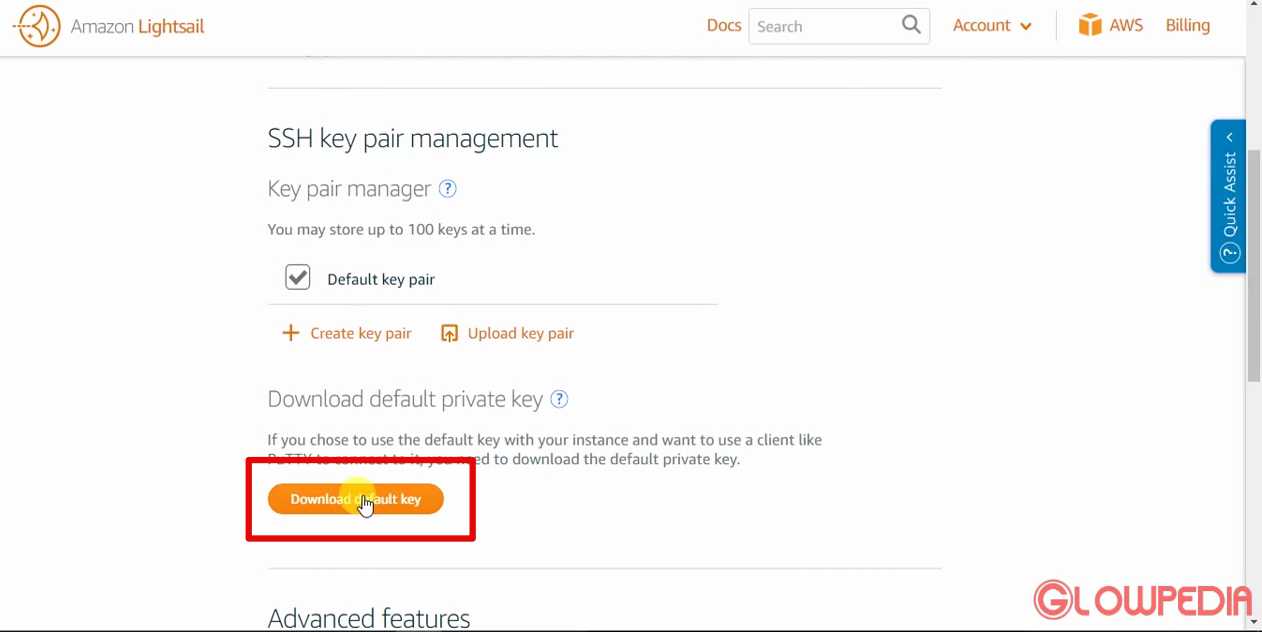
NOTE: It takes a while to get the instance get created, so please have patience and wait until you get the confirmation. - Once the instance is created, go to Account by click from the top corner of your screen and then Download default key and save it to your desktop or anywhere where you can find it handy

- You will be getting a .pem file which needs to be converted to .ppk.
Open Puttygen and select the default key which you downloaded and then click Save private key. - Go back to Amazon Lightsail dashboard and on the instance which you created click the three dots and select Manage > networking
- Scroll down to firewall and click + Add another > select HTTPS and click save
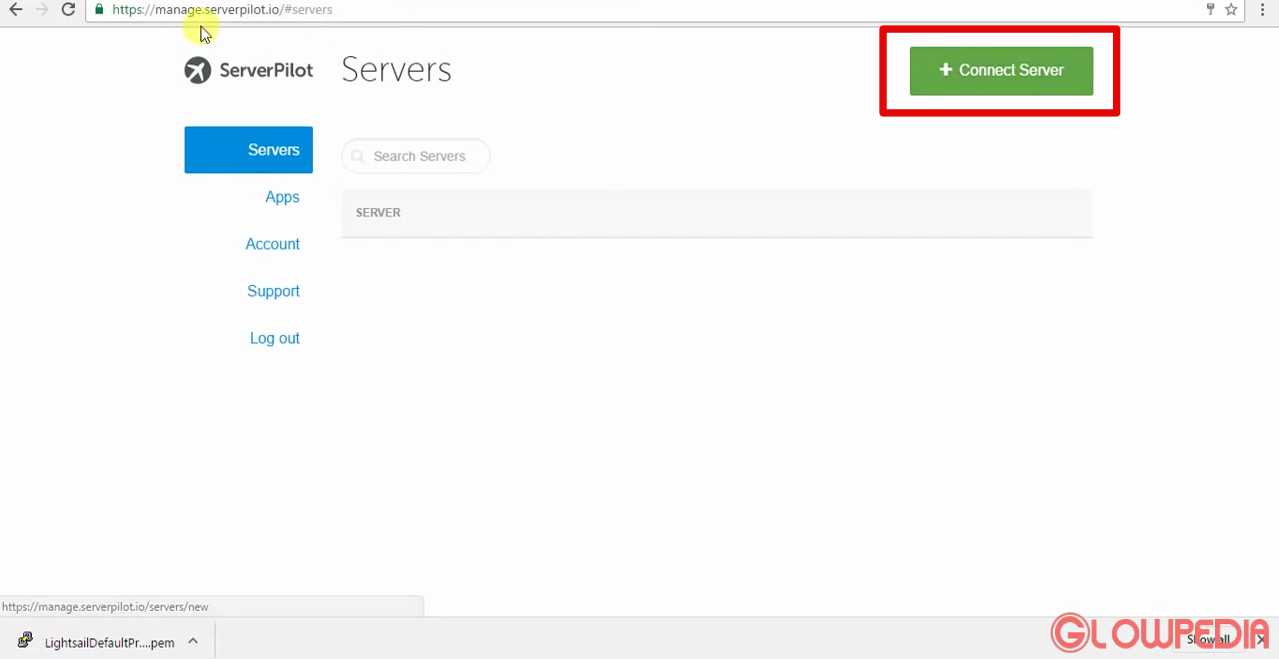
- Now go to Serverpilot and sign up or if you have already signed up then click on Connect Server

- Tick “I don’t have a root password or public IP address” and then put the IP address from the instance you created along with the password that was sent to you on your email from Amazon Lightsail.
Next, a window will open which we will follow from step 15. - Now open Putty and put the IP address in the Host Name and then from the left-hand navigation panel on Putty select SSH > Auth > add the private key file for authentication (select the .ppk file which we converted earlier in step 7.
- On the next screen it will ask for username, by default, it is “Ubuntu” and enter the password.
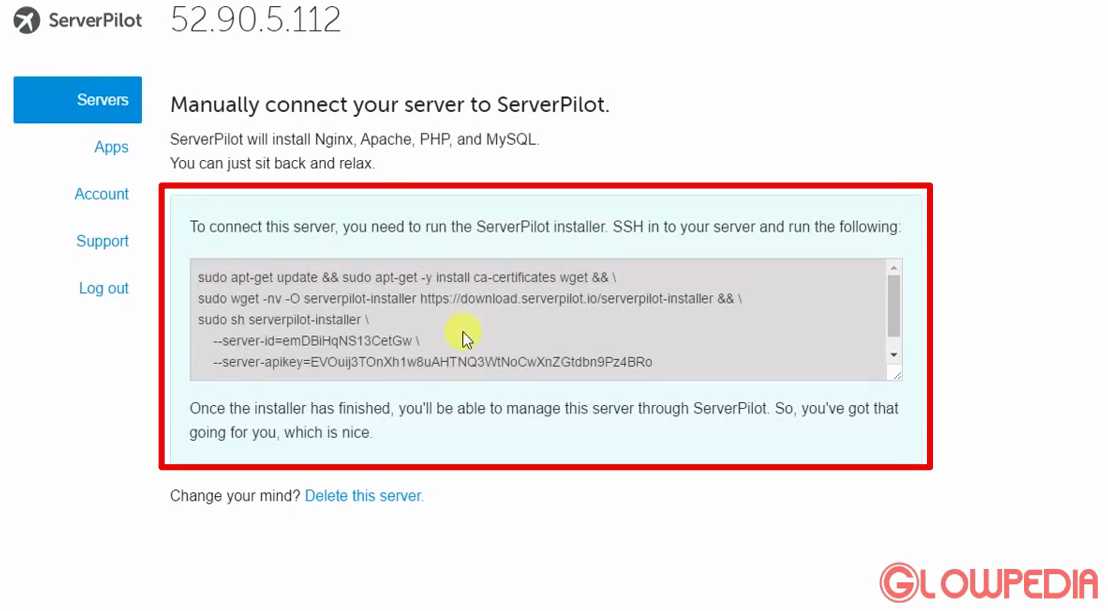
- Copy, paste and enter the following command on Putty one by one
sudo apt-get update && sudo apt-get -y install wget ca-certificates && \
sudo wget -nv -O serverpilot-installer \
https://download.serverpilot.io/serverpilot-installer && \
sudo sh serverpilot-installer \
- From Step 11 you must have got the commands above from step 14 and two more command lines mentioning server-id and server-apikey. You need to copy paste these commands on Putty when asked.

- Once it is done, you will the Serverpilot page on the browser automatically starts installing the server.

That’s it, we hope that the tutorial was not confusing and if you have followed step by step then it should have gone smoothly. If you have any doubt or not able to configure Amazon Lightsail server with Serverpilot then you can watch the video tutorial below or you can even ask us questions or have any doubt then use the comment section below.
When I enter sudo apt-get update && sudo apt-get -y install ca-certificates wget && \
Nothing happens.
All I get is a >
Watch the video tutorial once if you are having any doubt, make sure you have not skipped any previous part.
What happened to my question?